Configuring EWS Email with eM Client
This article shows you how to set up your Web Wiz email account in eM Client, with full calendar, contacts, tasks and notes sync over a Secure SSL/TLS Encrypted Connection. eM Client is a fast, native email program for Windows, macOS, iOS and Android. It connects to your mailbox using EWS, giving you the same Exchange-style experience – email, calendar, contacts, tasks and notes, plus sharing and delegation – with a consistent experience across all your devices.
Free eM Client Pro licence
Your Web Wiz mailbox qualifies for a free eM Client Pro licence for up to 3 devices, through SmarterMail’s partnership with eM Client. To receive your licence, please contact Web Wiz support and we will issue an activation for your account – there is nothing to buy.
1. Download and install eM Client
Download eM Client from www.emclient.com for Windows or macOS, or get the app from the App Store (iOS) or Google Play (Android). On a computer, run the installer and accept the default options.
The steps below show the desktop app on Windows (macOS is identical). The iOS and Android apps follow a similar process.
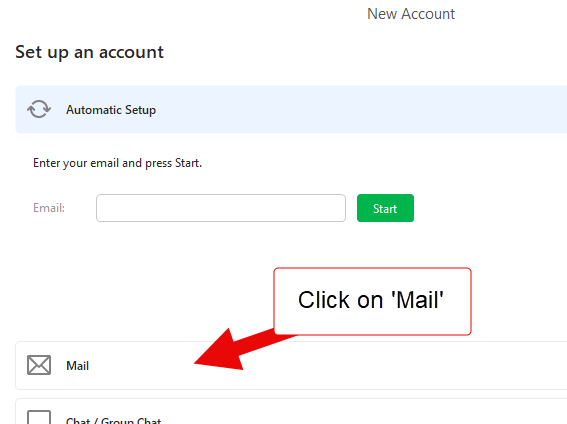
2. Start a new account
The first time you open eM Client it will offer to set up an account. (If you have used eM Client before, open the Menu, choose Accounts, then click Add Account.) On the Set up an account screen, click Mail to show the list of providers.
Please note: do not use Automatic Setup – it does not detect our servers, so we set the account up manually using the Exchange option below.
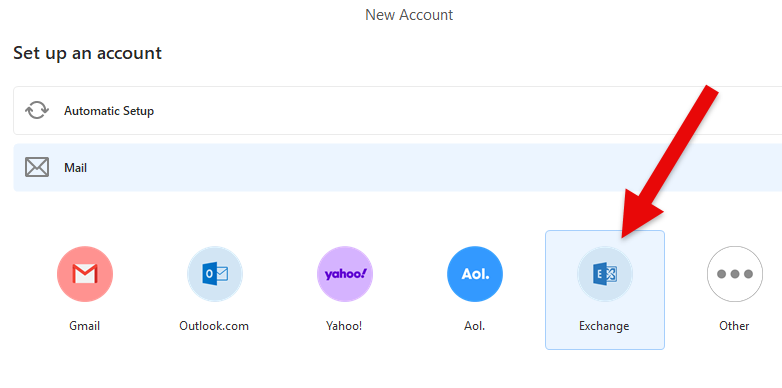
3. Choose Exchange
Under Mail, choose Exchange, then click Next.
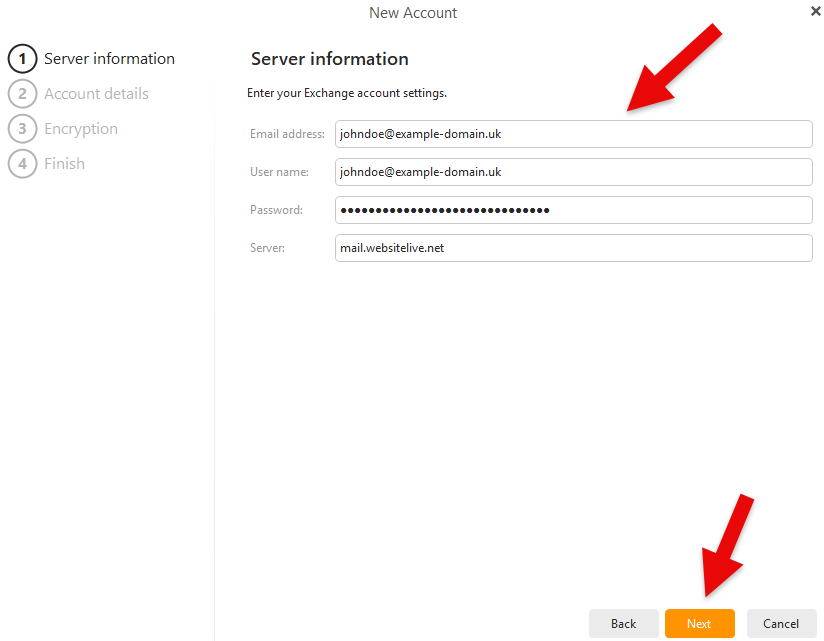
4. Enter your server information
Enter your details as follows, then click + Show more options to reveal the Server field:
- Email address
- Your complete email address, such as account@example.com
- User name
- Your complete email address again
- Password
- As you have specified in your Control Panel for the email address
- Server
- mail.WebSiteLive.net
Click Next to continue.
5. Account details
Enter a name for the account, then click Next:
- Your name
- The name your recipients will see when you send an email
- Account name
- The name you will see for this account in your account list
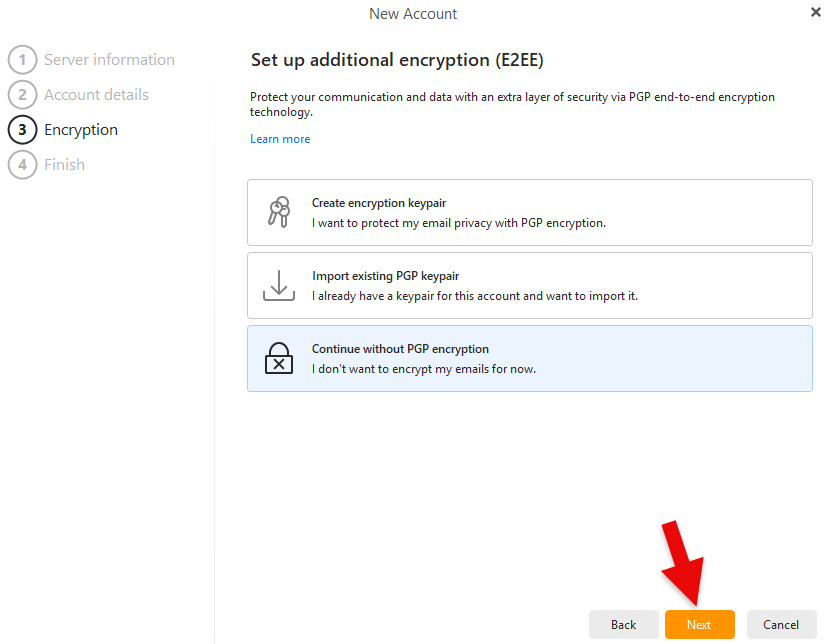
6. Encryption
You can ignore this step. Select Continue without PGP encryption, then click Next.
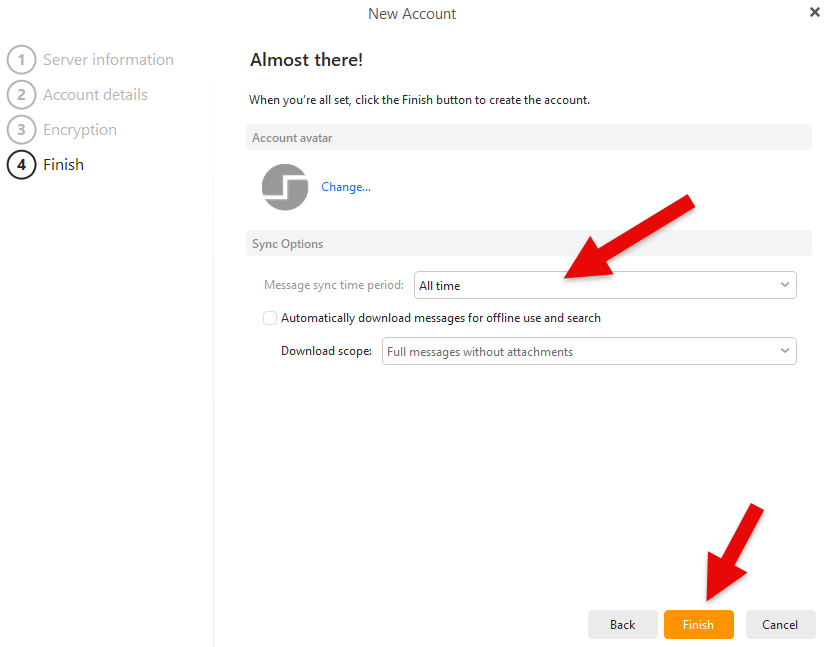
7. Finish
Choose how far back you would like to sync your mail under Message sync time period, then click Finish. eM Client will connect to your mailbox and begin syncing your email, calendar, contacts, tasks and notes.
Good to know – where to save contacts, calendar events and tasks
When you add a contact, calendar event or task, make sure you create it in the folders listed under your account name – not under Local Folders. Items saved in Local Folders are kept only on that computer and will not sync to the server or to your other devices.
Reference – connection settings
These are the settings used during setup, provided for reference.
- Account Type
- Exchange (Exchange Web Services / EWS)
- Email Address / User name
- Your complete email address, such as account@example.com
- Server
- mail.WebSiteLive.net
Web Wiz do not endorse or directly support third-party products and only give this information as a guideline for our customers mailboxes hosted on our servers.
Back To Hosting Knowledgebase Menu |